Classic Boat Information and Resources
Chris Craft – Gar Wood – Hacker Craft & More
Serving the Classic Boat Community for 30 Years
 How to varnish your boat
The first step is to decide whether you will brush or spray. There are pros and cons to each approach, as I will describe here.
Sprayed coats go on thinner, so you have to apply many more coats to get the same film thickness. Also, a great deal of that very thin film is removed when you sand between coats. Set-up and clean-up takes a lot of time compared to brushing, but the finish itself goes on faster. If you are working on a larger boat with 30 or more miscellaneous pieces, like cabinet doors and little trim pieces, it may be easier to spray. You can stage the pieces in a varnish booth so that all sides can be coated with one application. If you use Skip Sand (Epifanes Wood Finish Gloss) for your build coats, you can avoid sanding as long as you don’t exceed the recommended time between coats. This saves a lot of time when you are dealing with many little parts that are hard to sand. Be sure to apply Epifanes Clear Varnish for your top coat, as it is shinier and harder than the Wood Finish Gloss.
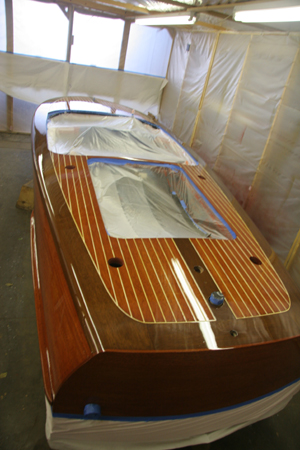
Brushed coats go on thicker and don’t take as long as you might think. Most of the time on a varnish job is not spent on the varnishing itself, but rather on removing and reinstalling the hardware, removing and reinstalling upholstery, picking out bad bungs (wood plugs), replacing broken screws, fixing deck seams, removing old registration numbers, straightening the waterline, sanding and cleaning.
The best way to apply a brushed coat is to start with a black foam roller. Mitch likes the 9 inch rollers, but the guys in our shop like the 4 inch rollers. Roller out an area about as big as half the front deck on a runabout, or the entire transom, then tip it off with either a 3 inch badger hair brush or a 3 inch black foam brush. Don’t even think about buying a china bristle brush at the hardware store. You can get badger hair brushes from Jamestown Distributors or Classic Boat Connection. Mitch likes badger hair, but if you go that route, you can’t let the brush dry out. Hang it in a jar of thinner when not in use, being careful that the bristles are not bent. The advantage to foam brushes is of course that they can be discarded, but they are stiffer and don’t conform to the curves of your boat like a brush.
Choice of Varnish
We have always recommended Epifanes brand. It goes on thick and the brush strokes flow out very nicely. It has a lot of ultra violet absorber, so it may last a year longer than cheaper brands. The regular Clear Varnish is shinier than many brands. Don’t use urethane on wooden boats, as it is very rigid, not stretchy like spar varnish.
Sealing and Varnishing
Allow fresh stain to dry for 3 – 4 days before your first varnish or sealer coat. You can either seal with Pettit #2018 clear sealer, a naptha-based product, or with varnish thinned 50% with Epifanes thinner. Our guys prefer the Pettit sealer. Apply two coats. Don’t sand these coats, or you will burn through to the stain, but you can use a 3M fine Scotch Brite pad. Don’t use a sponge brush, as it will smudge the stain. Be sure to wear an organic vapor mask during the sealer application.
We recommend applying 3-4 Skip Sand (Epifanes Wood Finish Gloss) coats, then sanding to flatten out. Your will want at least 12 coats of Epifanes varnish. Finish off with the regular Clear Varnish for your top coat. If anyone tells you they applied 20 coats of varnish, they may have used a brand with less solids content, or they may have thinned their varnish more.
Cleaning
Before varnishing over an existing finish, wash the old surface with soap and water before sanding. Then wash again with denatured alcohol. Do not wipe down your work with mineral spirits, as it will dull the finish. Also, mineral spirits takes too long to dry. Continue to wash with alcohol and tack with a tack cloth between sanded coats. Don’t leave the tack cloth laying on the varnish, as it will cause problems.
Dust is sometimes a problem. To alleviate that, don’t varnish on a windy day. Sweep a day or two ahead of time, then hose the floor down if you can. Some people seem to build up more static charge than others. Your boat builds up a negative charge as you stroke the varnish brush. The positively charged dust in the air will be attracted to the fresh varnish. In a very bright light, you can sometimes see the dust particles accelerating toward the varnish. If you are able to build a varnish booth, you can install furnace filters and exhaust fans to help control the dust. Our varnish booth is a collapsible structure made of poly and wood framing and can be repositioned to suit the current project.
Thinning
If you use Petitt 2018 sealer for your first two coats, you can proceed to Epifanes varnish thinned 25% for your third coat, 15% for your fourth coat, and apply it straight after that.
Sanding
Do not sand the first two sealer coats. After you have applied about 3-4 coats of Wood Finish Gloss (Skip Sand), you can sand with 220 grit paper using an 18″ long auto body type sanding board. This will give you the flattest finish possible. As your coats build, you can go to the finer 320 grit paper. We use Norton 2 3/4 inch wide sandpaper rolls, or 3M Gold. The 3M paper is more expensive, but lasts longer. If you have a compressor, you could use a pneumatic in-line sander instead of the hand sanding board. Some people use a finishing sander with a 1/4 sheet of sandpaper, but this can give you a wavy finish compared to the long narrow sander.
Hope you find this useful for getting started.